Showing posts with label Customize Blogger Tips.. Show all posts

Adjust Blogger Title Tags to Improve SEO

This Blogger tutorial explains how to improve search engine optimization (SEO) of your Blogger blog (Blogspot blog) by optimizing your post title tags for search engines like Google and Yahoo. How to improve search engine results by optimizing post title tags.

By default your Blogger blog (Blogspot blog) does not have search engine optimised title tags. This puts your blog at a disadvantage compared to other blogs that have inbuilt SEO or enhanced SEO modules as these sites are likely to be placed more highly in search engine results.

The title tags of your blog are ordered by blog name first followed by the title of the post. This is not ideal for popular search engines like Google and Yahoo which give more importance to the first words of a title. By way of example take a look at how the title tags of this blog were viewed in a browser before any SEO. Note the order of the tags: Blog Name | Post Name.

How Blogger Title Tags are viewed in an IE browser

When this site was first indexed by Google this is the search engine results this site received. Note how the blog name is first in all the results.

Search engine result for blogknowhow.blogspot.com before the tweak

Fortunately there is a simple tweak to your template which can rectify this problem. By simply reversing the position of the blog name and page title significant improvement can be gained in search engine results. See the difference in the example below:

How Your Blogger Title Tags are viewed in your browser with change

Follow the step by step guide below to achieve higher rankings in search engine results.

Tweak of Title Tags for New Blogger (beta) Blogs

1. Login to your blog at Blogger.com and navigate to Design > Edit HTML

2. Backup your template by downloading it to your computer. This will ensure that you can upload your template before these changes in case of problems.

3. Replace the following line of code (about 5-10 lines from the top):
<title><data:blog.pageTitle/></title>


with (highlight code, Ctrl + C to copy)

<b:if cond='data:blog.pageType == &quot;item&quot;'>
<title><data:blog.pageName/> |
<data:blog.title/></title>
<b:else/>
<title><data:blog.pageTitle/></title>
</b:if>

4. Click on Save Template and then View Blog. Navigate to an individual post. You will see that your page title is now first followed by your blog title. A pipe symbol separates the two.


Below is an example of the change in search engine results since the tweak was implemented for this site. Since optimising for search engine friendly page titles there has been a significant improvement in traffic accessing the site. This didn't happen right away but if you too implement this page title tweak and continue to deliver quality content you are on your way toward higher search engine rankings.

Blog Know How Search Engine Results in Google with Title Tags Tweaked

Troubleshooting
Several readers have reported issues with the line:

<b:if cond='data:blog.pageType == &quot;item&quot;'>


If you experience problems try inserting this line instead which works on many blogs. Ensure you have double quote marks around item followed by a single quote mark: 

<b:if cond='data:blog.pageType == "item"'>


For more on this please read the comments section.

UPDATE
Due to the number of readers experiencing problems with their browsers reading this post I have created a PDF file of this article which is free to download

This Blogger tutorial (Blogspot tutorial) has discussed how to adapt the title tags of a Blogger (Blogspot) blog to improve search engine optimization (SEO) by Google,Yahoo and other search engines.

Add a Horizontal Links Menu to Blogger

In this Blogger tutorial you will learn how to place a horizontal row of menu items above your first post in your Blogger blog (Blogspot blog). This process requires adding both a small amount of code to your Blogger template and a HTML/Javascript widget to your layout. This tutorial is suitable for Blogger (Blogspot) webmasters of all abilities.

Navigating a website using a horizontal menu is a traditional way to get around. On this blog for example you can see that I have tweaked Blogger to create a row of horizontal text links for easier navigation of popular pages and labels. Follow the step by step instructions below and you will be able to add a customized menu of horizontal links to your Blogspot blog as seen here.
Update Nov 14, 2010. If you are using a default template you can add a menu by using the Blogger pages feature. This tutorial shows you how to manually add a top menu and add links to it.

Steps to Add a Horizontal Links Menu Above Blog Posts

1. In Blogger navigate to Design > Edit HTML

2. Locate the header style sheet section which will usually be notated as
/* Blog Header */

If you can't find this line then locate the following area of your stylesheet using CTRL + F and place before these lines
]]></b:skin>
</head>

3. Copy and paste the following CSS code into your template under the header section taking care not to overwrite any existing code and to include the end bracket. It is probably best to paste into the bottom of the header style sheet section so that it is easier to change the code if necessary.
/* Blog Header */

#newnavbar ul li{
font-size:100%;
list-style-type: none;
display:inline;
padding:0px;
margin:10px;
border:0px solid;
}

#newnavbar li a{
color:#335577;
}

#newnavbar li a:visited {
color: #990066;
}

#newnavbar li a:hover {
color: #99FFFF;
background: #CCFFFF;
}

4. Click on Save Template

Note: You will need to change the colors to suit the color scheme of your blog. Change every instance of color and the background color to customize to your own requirements

5. Navigate to Design > Page Elements

6. Click on Add a Gadget in the Blog Posts area. If you don't have this option already set on your template you can enable it by locating the following code and setting showaddelement to yes.
<div id='main-wrapper'>
<b:section class="'main'" id="'main'" showaddelement="'yes'>

7. Select HTML/Javascript from the menu

8. Copy and Paste the following code into the Content box. There is no need to add a title. You can alter the code to suit your own needs depending on the links required.
<div id='newnavbar'>
<ul>
<a href="Home Page URL">Home</a></li>
<li><a href="URL of Your Blogger Profile Page">About Me</a></li>
<li><a href="URL of Any Label You Choose">Label of Your Choice</a></li>
</ul></div>

To add a link to a label, as I did on this site, in this case Blogger Tutorials, you would enter the following:
<a href="http://blogknowhow.blogspot.com/search/label/Blogger%20Tutorials">Blogger Tutorials</a>

9. Your script should be above your posts and any advertising or banners. If it is not drag it to the top position
Edit Blogger Layout Page Elements Blogger Posts Section
10. Click on Save

11. Click on View Blog to see your new menu in action


Steps to Add a Horizontal Link Menu to Header

If you prefer you can add your horizontal link menu to your header instead of directly above your first post. In this case follow the steps below:

1. Follow steps 1 to 4 as for menu above first post 

2. Navigate to Design > Edit HTML

3. No need to check Expand Widget Templates

4. Locate the beginning of the body section which will be tagged as <body>

5. Find the line: <b:section class='header' id='header' maxwidgets='1'>

6. Change maxwidgets from 1 to 3.

Edit Blogger Template to change number of widgets in header

7. Click on Save Template

8. Navigate to Design > Page Elements

9. Click on Add a Gadget in the Header area.

10.Select HTML/Javascript from the menu

11.Copy and Paste the following code into the Content box. There is no need to add a title. You can alter the code to suit your own needs depending on the links required.
<div id='newnavbar'>
<ul>
<a href="Home Page URL">Home</a></li>
<li><a href="URL of Your Blogger Profile Page">About Me</a></li>
<li><a href="URL of Any Label You Choose">Label of Your Choice</a></li>
</ul></div>

To add a link to a label, as I did on this site, in this case Blogger Tutorials, you would enter the following:

<a href="http://blogknowhow.blogspot.com/search/label/Blogger%20Tutorials">Blogger Tutorials</a>

12. Click on Save Template

13. Click on View Blog to view the new horizontal menu in your header

Tips and Troubleshooting
To add this horizontal navigation menu to the area below the header do the following:
  1. Login in to Blogger
  2. Navigate to Design > Edit HTML
  3. Find the following lines of code:
    <div id='crosscol-wrapper' style='text-align:center'>
    <b:section class='crosscol' id='crosscol' showaddelement='no'/>
    </div>

  4. Change showaddelement to yes
    <div id='crosscol-wrapper' style='text-align:center'>
    <b:section class='crosscol' id='crosscol' showaddelement='yes'/>
    </div>

  5. To left align the menu change text-align:center to text-align:left
  6. Paste the code in step 3 of Steps to Add a Horizontal Link Menu Above First Post directly before the following:
    ]]></b:skin>
    </head>

  7. Save Template
  8. Navigate to Design > Page Elements 
  9. Click on Add a Gadget in the new area enabled below header
  10. Select HTML/Javascript from the menu
  11. Copy and paste the code in step 8 of Steps to Add a Horizontal Link Menu Above First Post into the content area of the gadget and change links to your own requirements
  12. Save gadget and select View Blog to see your menu in action

This Blogger tutorial has shown you how to add a horizontal links navigation menu to a Blogger blog (Blogspot blog) either in the header itself, directly above the very first post or in the area between the header and first post. In adding a navigation menu to your blog you improve the user friendliness of your blog by helping your visitors find information and posts more readily. Any questions please don't hesitate to ask.

Add a Recent Posts Feed to a Blogger Blog

One very simple way to increase page views of your Blogger (Blogspot) blog is to add a recent posts feed to your site. The procedure is easy and effective and does not require any template tweaking. This tutorial assumes limited technical knowledge of Blogger and is mostly aimed at new bloggers and beginners although it is suitable for any Blogspot blogger who wants to increase site traffic.

If you would like to add a recent comments feed to your Blogger (Blogspot) blog please see my tutorial Add a Recent Comments Feed to a Blogger Blog

Below I will take you through the steps of adding a widget so that your feed is displayed in your Blogger blog's sidebar. Unfortunately the maximum number of items that can be displayed in the posts feed at this point is limited to 5 due to a Blogger limitation. I have not found a hack to increase this level but when I do I will update this post.


Add a Recent Posts Feed to the Sidebar of a Blogger Blog

1. Login to you Blogger blog and navigate to Layout > Page Elements

2. Click on Add a Gadget in the sidebar and select the Feed widget

3. A popup dialog box will appear requesting you to configure the URL of your feed. Enter the following text into the box:
http://yoursitename.blogspot.com/feeds/posts/default

Be sure to substitute yoursitename for the name of your site 

Add Site Feed Widget to Blogger Sidebar and Configure Site Feed

4. If you have entered the address of your post's feed correctly Blogger will retrieve your feed and display a preview in a dialog box. The feed will include links to the last five posts on your site. 

5. Delete the name of your blog and type in Recent Posts instead

Add Site Feed Widget to Blogger Sidebar and Preview Site Feed of Recent Posts
6. Click on Save

7. Click on View Blog to see your new Recent Posts feed in action.

Blogger Sidebar Widget Featuring Recent Posts Feed on the Blog Know Know website
8. If you want to change where it appears in the sidebar this can be achieved by returning to Layout > Page Elements and using the drag and drop feature to position the widget.


Troubleshooting
If you are using a feed delivery service like FeedBurner your default feed URL will be being redirected by Blogger.com. In this case you will need to enter the Feedburner address of the feed which is likely to be something like this:
http://feeds2.feedburner.com/YourSiteName

Notice how Feedburner capitalizes your blog name. Check the exact address at Feedburner if you are not sure of the feed address. For more on burning your feed at Feedburner check out these articles: Blogger RSS Feeds and Feedburner and Burn Blogger RSS Feeds at Feedburner and Add a Feedburner FeedFlare to a Blogger Feed


This tutorial demonstrates how to add a recent posts feed to your Blogger (Blogspot) blog so that it can be displayed in a widget in the sidebar of your Blogger blog.

Add a Recent Comments Feed to Blogger Sidebar

When you add a recent comments widget to a Blogger blog (Blogspot blog) using your Blogger comments feed you will encourage visitors to comment on your blog and hopefully improve blog traffic blog.

It only takes a couple of minutes to add a Recent Comments widget to Blogger. It is also easy since it requires no editing of your Blogger template. This Blogger tutorial assumes limited technical knowledge of Blogger and is mostly aimed at new bloggers and beginners although it is suitable for any Blogspot blogger looking to increase action on their blog.

If you would like to add a Recent Posts Feed to your Blogger website please refer to my earlier article Add a Recent Posts Feed to a Blogger Blog (Blogspot Blog)

Below I will take you through the steps of adding a feed widget to the Blogger sidebar so that the Blogger default comments feed will be displayed there. Equally you could add this widget to the footer if you prefer. 

I am going to show you two different widgets to add Recent Comments to your blog. Which you choose is up to you and largely depends on how many comments you wish to display. 
Method 1 - Using the Blogger Feed Widget toAdd Recent Comments Feed to Blogger
This first method is the old way to add recent comments to Blogger using the Blogger feed widget and is still my preferred method. The limitations are though that the maximum number of comments displayed is 5.

Method 2 - Alternative Method to Add Recent Comments Feed to Blogger
There is another Blogger widget that can be added to Blogger which will display up to 10 of the most recent comments on your blog. By default it shows the author's name and this can not be removed. If you are happy with this and would like more comments displayed this is a nice widget. One problem with the widget though is it will not necessarily display in the font of your blog. You will need to check this by installing it to try it out.
  1. Login to you Blogger blog
  2. From the Dashboard go to Design > Page Elements
  3. Click on Add a Gadget in the sidebar
  4. Select the Feed widget from the list of Basic Widgets
  5. A popup dialog box will appear requesting you to configure the URL of your feed. Enter the following text into the box labelled URL Feed substituting the URL address of your blog name eg blogknowhow.blogspot.com for yourblogname:
    http://yourblogname.blogspot.com/feeds/comments/default

    Add Site Feed Widget to Blogger Sidebar and Preview Site Feed of Recent Comments
  6. Click on continue. If you have entered the address of your comments URL feed correctly Blogger will retrieve your feed and display a preview in a dialog box. The feed will include links to the last five comments made on your blog.

    Preview of Comments Feed for Blog Know How Blogger Blog
  7. Unless you want less than 5 comments to display leave show 5 as is
  8. Under Title replace the name of your blog with Recent Commentsinstead
  9. If you want to be able to see the date of the comment check theItems Dates box
  10. If you want to have the comment author displayed check theItem/Sources Author
  11. Unless you are worried about visitors leaving your blog there is no real need to check Open in a New Window(note this option has been added since I first wrote this tutorial so it is not in the picture)
  12. Click on Save
  13. Click on View Blog to see your new Recent Comments feed in action.


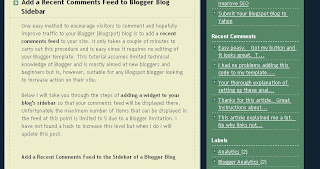
Below you can see an example of what the recent comments widget will look like. (Naturally it will be styled to suit your blog.) You can also see it operating in the sidebar of this blog.

View of Blog Know How Site with Recent Comments Feed Widget Installed
8. If you want to change where it appears in the sidebar this can be achieved by returning to Design > Page Elements and using drag and drop to position the widget into the spot of your choice on the Blogger sidebar.

Troubleshooting
If you are using a feed delivery service like FeedBurner the default comment feed URL will be being redirected by Blogger.com. In this case you will need to enter the Feedburner address of the feed which is likely to be something like this:
http://feeds2.feedburner.com/Comments/YourSiteName

Notice how Feedburner capitalizes your blog name. Check the exact address at Feedburner if you are not sure of the feed address. For more on burning your feed at Feedburner check out these articles: Blogger RSS Feeds and Feedburner and Burn Blogger RSS Feeds at Feedburner and Add a Feedburner FeedFlare to a Blogger Feed

Method 2 - Using a Contributed Gadget to Add a Recent Comments Widget to Blogger (Blogspot) 
  1. Login to you Blogger blog
  2. From the Dashboard go to Design > Page Elements
  3. Click on Add a Gadget in the sidebar
  4. Click on Most Popular from the menu on the left hand side of the Add a Gadget window
  5. Select Recent Comments
  6. Change the number of comments to display according to your individual blog requirements. The Preview box will show you what your widget will look like with less than 10 comments
  7. Change the Summary Length to 100 px or leave as is if you prefer

  8. Click on Save to activate your Blogger widget
  9. Click on View Blog to see your Recent Comments Widget displayed
  10. Use drag and drop in Design > Layout to position your widget as you desire


This Blogger tutorial has demonstrated two different methods of adding a recent comments gadget to your Blogger blog (Blogspot blog) using Blogger widgets. The recent comments widget is probably best displayed in the Blogger sidebar or it can be moved to the footer if you prefer and of course depending on your blogger template.

Add a Categories Section to a Blogger Blog (Blogspot Blog)

Blogspot blogs at Blogger.com have no categories only labels. This Blogger tutorial will show you how to manually create categories in Blogger from your existing labels so that all the articles listed under a particular label will be displayed.

While this way to add categories to Blogger is not an ideal solution it will mean that you can display a logical grouping of your most popular articles under the one heading.

This article is aimed at new bloggers and beginner bloggers although it is suitable for all Blogger bloggers (Blogspot bloggers). No changes to the template are required to add these categories to your Blogger blog (Blogspot blog).

How to Create Categories from Labels in Blogger
One easy way to create a categories section in Blogger is to simply rename the title of the labels widget as categories. This solution does not work for me because on this blog I have a huge number of labels and I don't want to show this widget at the top of my sidebar.

An easy way round this problem is create a separate categories section. If you look at the sidebar of this blog you will notice that I have several major categories at the top so that a new visitor will find what they are looking for quickly under these broad headings.

Example of Categories Section from Blog Know How sidebar
To add a categories section to a Blogger blog (Blogspot blog) follow these simple steps:

1. Decide how you want to group your articles according to the labels applied and what group heading you want to give to each grouping of articles.

2. For the first category navigate to the individual page of the label you wish to use by clicking on the label in your sidebar. Copy the URL address of this page from the address bar in your browser (right click and select copy). For example the URL address of the label of Blogger Tutorials on this site is:
http://quickearningtricks.blogspot.com/search/label/Blogger%20Tutorials

3. From the Blogger Dashboard go to Design > Page Elements

4. Click Add a Gadget in the sidebar and select Links List

5. In the Configure Link List dialog box that appears paste the link to your label into the New Site URL box

blogger Configure Link List to Add New Categories Section to Your Blogger Blog

6. Enter the name of your label or some alternative text if you wish into the New Site Name text box. 

7. Enter Categories as the title

8. Choose between sort alphabetically, reverse alphabetically or don't sort

9. Click on Add Link to add the link to your new categories list

10. Click on Save

11. For every label you wish to put into the Categories Section copy the link and add it to the Configure Links List. By the end you will end up with two or more categories in your list

12. Use the up and down arrows for each link to shuffle them around until you find the desired order

Blogger Configure Link List - Added Links to Create Categories in Blogger

Limit the Number of Posts Displayed in the Categories Section
To put a limitation on the number of posts displayed in the new categories section you will need to adjust the URL's of each label as follows:

From:
http://yoursite.blogspot.com/search/label/CategoryName

To:
http://yoursite.blogspot.com/search/label/CategoryName?max-results=max number of posts to display

So for the category Blogger Tutorials on this site for example I would enter the following to have only 25 posts displayed:
http://quickearningtricks.blogspot.com/search/label/blogger%20Tutorials?max-results=25

This Blogger tutorial has shown you how to manually add a categories section to the sidebar of your Blogger Blog (Blogspot blog) using the Link List widget.